UK Pet Forums Forum banner

Hamster Cage build

4.1K views 20 replies 10 participants last post by  househens  
#1 · (Edited)
Thought i'd share my progress of a hamster cage i'm working on... its a converted ikea bookcase...

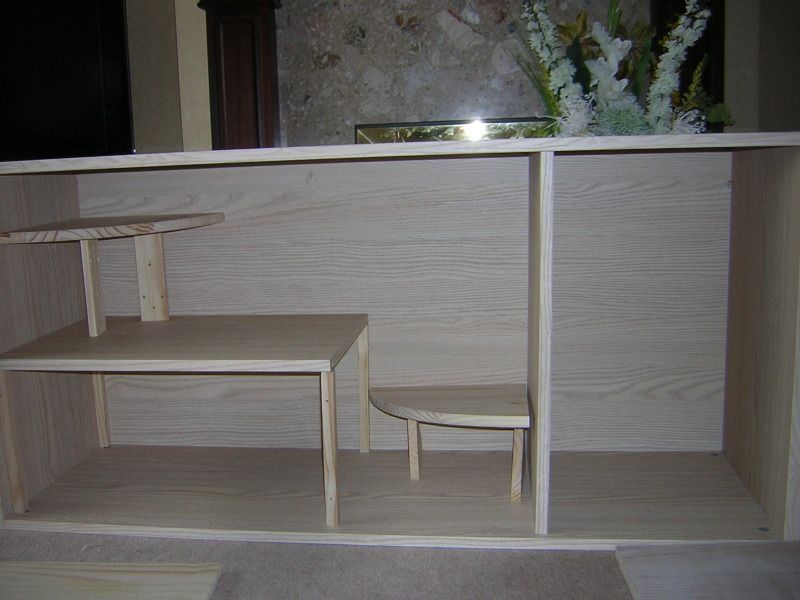
firstly I laid out the shelves to figure out where everything was going to go

Image


These are the basic levels and the section on the right is going to be split in half to create a digging box on the bottom and a 'wild desert' on the top

I've started sticking everything in place so once its dry i'll grab another shot... hoping to have this finished by next week.

Image

And this is domino, who's going to be living in it :)
 
#4 ·
I can't wait to see it finished, little Domino is going to love it :D
 
#5 ·
Thanks guys :) i'm hoping so, so far i've spend about ÂŁ50 on it (plus a further 20 on toys and accessories so i'd have to spend that anyway) so its costing roughly the same as a ferplast duna fun which is what he's in temmporarily... but as this will give him around 12 sq ft of space i think it might be slightly better value for money... i'm also hopeful that because this is so large i'll be able to bond him to a friend (never tried adult robbos before so that could be interesting) but i dont like seeing social hams on their own
 
#6 ·
Bonding adult hams :eek:, I hope you manage it or you will have to make cage number 2 ;). The cage looks amazing so far, what are you using to stop the wee getting into the corners/seams and making it smelly? Ive heard plasticote and that type of paint is good.
 
G
#7 · (Edited)
Looks fantastic.

But I'm such a scrounger... What about buying a nice solid wood tv unit to convert, at a boot/garage sale? You could buy a metal cd stand, to climb, perhaps on an angle, or sidewise, as a tunnel/ladder... metal would be easy to clean... You could get the lower, wide type of tv cabinet, but perhaps put 6 long legs on it, to get it to a comfortable height to service OR get the tall version, and use the bottom drawers, etc for storage.

Possible idea for ease of cleaning, and prevent chewing. Buy thin, malleable sheet metal, to line floor, and up 1st 4?inches? Even 2 inches at the front, so you can have a litter floor. You could nail it in, or set it up so you can slide it out. Never had hams, and had guinea pigs and rabbits, outside.

Forgive me if you are already doing that stuff... I was all excited at the great idea.
 
#8 ·
i've done it before with winter whites and campbells (found it easy if the cage was big enough but never robbos... still not sure if im brave enough to try it lol)

and i did kinda scrounge the bookcase... it used to have books on it... but since i got a kindle i managed to reduce my book collection considerably to fit in a bigger hamster cage... and the bookcase was handy ;)
 
#9 ·
The habitat will be wonderful for the hammie when its finished. As for the bonding...you will have to sit and watch them very carefully. I had 3 little sister robo's together until one day they decided that 3 should become 2 , but luckily we separated them before any real damage was done but they will fight to the death if you leave them when they aren't getting on.
 
G
#11 · (Edited)
I am hopeless at practical things. I don't know if I could make a door well enough. Will you use a fine mesh? Could you find a 2nd hand small window, you can trim, to fit?That you can open right out, for cleaning?

I'm so excited at the idea...

You'll be able to grow pots of grain, and herbs, outside, to rotate, daily, to put in, too, at that size.
 
#12 ·
i've already got some mini pots of grasses growing for him (im a bit hopeless with plants tho so not holding my breath) and for the doors i have a very handy joiner next door who's gonna help... erm build them for me (i'm currently pet sitting their animals while they're away so he cant really say no :ihih:) but we're gonna put a strip of mesh across the top for ventilation but the doors are going to be perspex so i can see in clearly and he cant climb it, i've got some aquarium 'non toxic' sealant to go round the edges of all the shelves and to stick the fences on with, which should stop the pee seeping in... thats todays task .... fun not
 
#13 · (Edited)
Update on my progress so far

overview of the cage today

Image


the basic structure is all in and the shelves on the left hand compartment are fixed (with the exception of the highest on the right, im still deliberating over that one) and i've stuck on the bridges and 'fences' although i still have to fence the bridge to the main shelf

then theres the top right shelf to finnish, i think ive decided to use a full height perspex screen to prevent any falling accidents, and then just need to make the digging box and the desert...

bottom layer

Image


top layer

Image


any input or suggestions to improve whats in welcome :)
 
#14 ·
I want to move in :D, it looks amazing so far :)
 
#18 ·
For ventilation i'm going to have a mesh panel across the top, if thats not enough i've got some vivarium. And i've really enjoyed making it so far, so i might do another project next holiday to sell on... but theyre heavy so no idea how i'd get it to you bernie xx
 
#19 ·
For ventilation i'm going to have a mesh panel across the top, if thats not enough i've got some vivarium. And i've really enjoyed making it so far, so i might do another project next holiday to sell on... but theyre heavy so no idea how i'd get it to you bernie xx
You might make some? *squee*
It looks amazing. Someone has got a very, VERY lucky pet!